
Techniques for Dry Fly Fishing
Part One: Casting to Trout
A sight seared into my memory is one large brown holding off of a cut bank just above the weir below Pine Flat Dam on the Kings River. It was late summer, and I was kicking up hoppers as I made my way up to my favorite riffle to fish that afternoon. I initially mistook the fish for a submerged log, but it moved and hammered a grasshopper that had fallen into the river. There is something so appealing about watching a fish eat your fly. If you are dead drifting or high-sticking nymphs, you often won’t see the fish until you are ready to net it. The sometimes explosive, surprising surface take is one of the most satisfying experiences a fly fisher can experience.
I propose many fortunes have been spent in the pursuit of trout with the dry fly. The chances to fool a rising fish in this neck of the woods are fleeting, so when you have put aside vacation time, amassed the right flies, rods, lines, and tippet, and have spent hours waiting for the hatch to begin, you want to be prepared when the opportunity strikes. We have put this series together to help you determine what skills, techniques, and knowledge you will need to acquire to become a proficient dry fly angler.
In Presentation Casts, the first post in our three-part dry fly fishing series, Chris King will discuss the concepts and techniques used to deliver and fish dry flies to rising trout. In our next post, Recognizing Rise Forms, Chris will follow up with what rings or boils mean and why they are important. To conclude the series, Mike Mercer has a few thoughts on entomology and fly selection.
Presentation Casts
Almost everyone who has written about casting over the last 100 years has mentioned, talked about, or even invented different presentation casts. The reality of all these special casts — with funny names like the parachute cast, the tuck cast, the negative curve, and the super flipper dipper cast — is that there are a few basic casts that will serve most of your trout fishing needs for a lifetime.
When do we use a presentation cast and why? The answer is simple. When dry fly fishing, it is important to maintain a certain amount of slack line in the fly line and leader during your drift in order to achieve a dead or natural drift (that is a drift that floats exactly with the current with no additional movement other than that caused by the water that the fly is in). Once a fly and line have been placed on the water while dry fly fishing, it is very difficult to adjust the line with mending as you would during nymph fishing. The result of a dead line mend is usually a tightened leader, which will cause the fly to be affected and moved by different currents other than the one that it is in. This movement is called “drag” and is something to be avoided at all times while trying to achieve a natural drift. Therefore the mends needed to properly drift the fly in the current must be made in the air before the line is on the water. These aerial mends are what make up the bulk of all presentation casts.
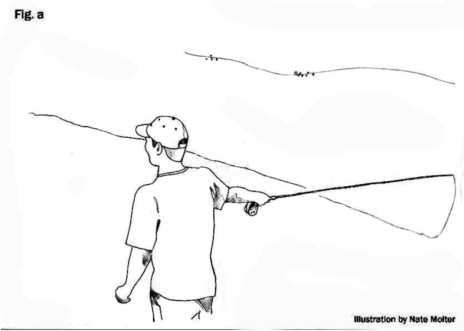
The Reach Cast:
The reach cast is probably one of the easiest and most commonly needed casts in all of your fishing. The reach cast does one thing: It places the fly on the water and the line to one side or another.
Before the reach cast is made, you must have extra line out of the reel. You must use more line than is necessary to achieve the desired distance. Then after a few false casts, you make your final cast towards the target and release the fly line. As the cast is traveling toward the target, immediately after the stop on the forward cast, “reach” your rod to one side or the other. When the line lands on the water it should be coming back from the fly at an angle to the side you reached to.
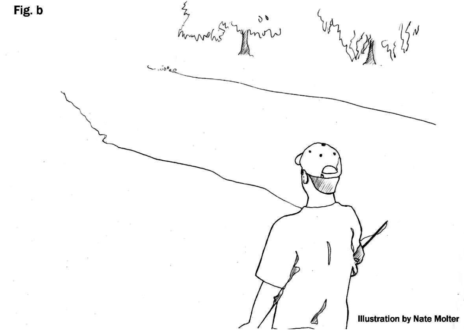
If the reach is done late after the cast, the result is a line that comes straight back to the caster and then turns out to the direction that the rod was reached (fig. b).
If the reach is done late after the stop and then brought back to pointing straight before the line lands on the water, the result is a line that travels straight back but has a hump of line to one side or the other (fig. c).
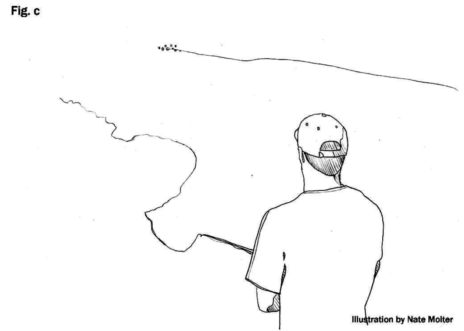
The latter is very useful for casting around rocks and other obstacles. Finally, if you reach to both sides during the same cast, this is the basis for the next presentation cast called the slack line cast.
The Slack Line Cast:
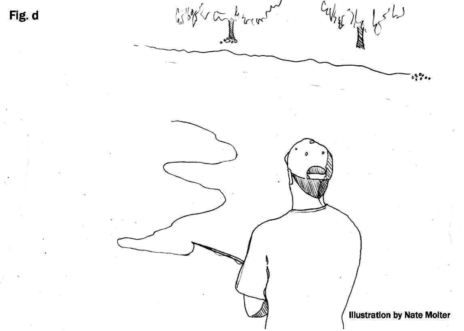
As I mentioned before, the slack line cast is nothing more than a version of the reach cast. This cast is useful for incorporating a large amount of slack line throughout the entire fly line. It is an excellent cast for a downstream presentation or one that is made across multiple currents.
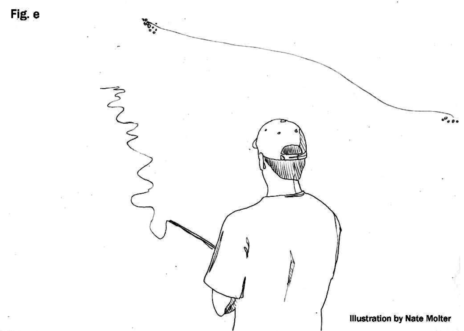
As with the reach, an extra amount of line is necessary to achieve the desired distance. After the stop has been made on the final cast, release the line and move the rod tip back and forth in front of you until the line has landed on the water. This will add a number of “S” turns in the line as it lands on the water. You can make the curves big by moving the rod back and forth a great distance and slowly (fig. d).
Or, you can make them small by moving the rod short and quick (fig. e).
The Parachute Cast:
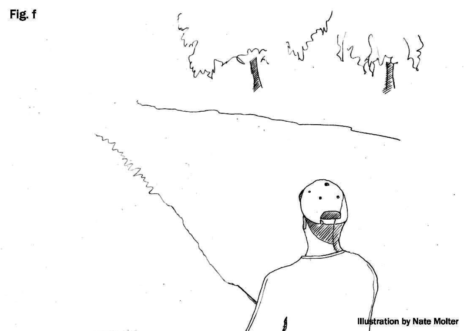
The parachute cast, also called the pile cast, is a cast that is designed to put slack in the leader and tippet sections of line and not necessarily in the fly line itself. This cast is very difficult to do on a windy day and should be avoided under those conditions.
To perform a parachute cast, aim the final forward cast up above the target. As the line straightens out in the air, pull the tip of your rod to the water’s surface. If done properly the fly line will roll out onto the water causing the leader to be pulled back down and come crashing into itself. The result will be a fly line that travels straight toward the target and a leader that is piled up in a loose configuration (fig. f).
These are what I feel are the most commonly used and needed presentation casts that we have. Learn them and you will surely be able to make longer drag free drifts. Modify them as you wish, and come up with your very own variation of them. Certainly there are many more casts that are done on a river and that have been written about in books. However, the casts mentioned here are all an angler would need 90 percent of the time.